And find them I did at Waltzing Mouse Stamps. They are in Ireland so it took a bit for them to get here but far from the 28 days+ that they warned it might. (Dear Customs....they are JUST cling stamps.)
Look at the cuteness!
These will be so much fun later. Okay, well I played with them tonight too.
This set is a bunch of friendshipy labels. I have a craft in mind for them, but you might have to wait a bit. I also bought the spellbinder die that matches the label shapes. It should arrive tomorrow.
More Halloween stamps. These are actually the ones I saw used on Etsy and greatly wanted. Specifically the "go ahead eat it I dare you" stamp. The round stamps can be cut out with a 2 inch round punch so they say but *sniff* I don't have one.
I don't drink tea much but it's so adorable, I had to have it. I love the ones that look like the tags from teabags.
And here is the alterations I made to my Distress Ink. I bought enough blending tool extras to go on the bottom of all my Distress Ink I picked at the Michael's Memorial Day sale. The blending tool thingamabobs attach to the tool with velcro. Soo...
I busted into my mason jar of velcro and got the coordinating pieces and used them on the bottom of the inks to attach the pads. That way (I saw a blog that recommended this) I have a dedicated pad for each color.
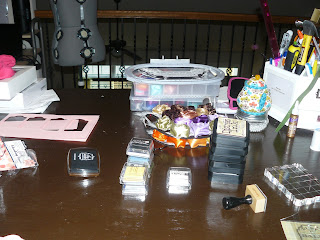
My table top is SO MESSY right now. And as I'm writing this my power has gone out AGAIN. Yay for laptops.
Here's what the round ones did. The top 2 on the left were done on top of a piece of foam. So foam -> paper -> stamp -> clear acrylic block. The bottom one wasn't. But I tried again without it and I got better. See the right for the "I'm getting better"ness.
I cut out a bunch of tags with the Tags, Bags, Boxes and More cartridge with my gypsy and Cricut. Above each tag is the ink I used. I really liked the brown and the red. I could not get the green to come out well no matter how I tried.
Oh and if you are new to clear cling stamps: really easy. You need the cling stamps and a clear acrylic block that is bigger enough to hold the stamps. One side of the stamp is fairly flat, the other is rigid (the side that will get inked). The flat side of the stamp will stick all by itself to the clear block. You put ink on the stamp and off you go.
Previously I had better luck with the little inks, which turned out to be pigment ink. That explained why they gave me such better coverage off the bat. BUT, this go round I really liked the Distress Ink better. It seemed to take to these stamps better and it was far easier to clean off them. And I really liked the Walnut Stain best.
I can't wait to make these to go with all my future food labels on Halloween.


No comments:
Post a Comment